DIY 3D-Printed Mace/Gada

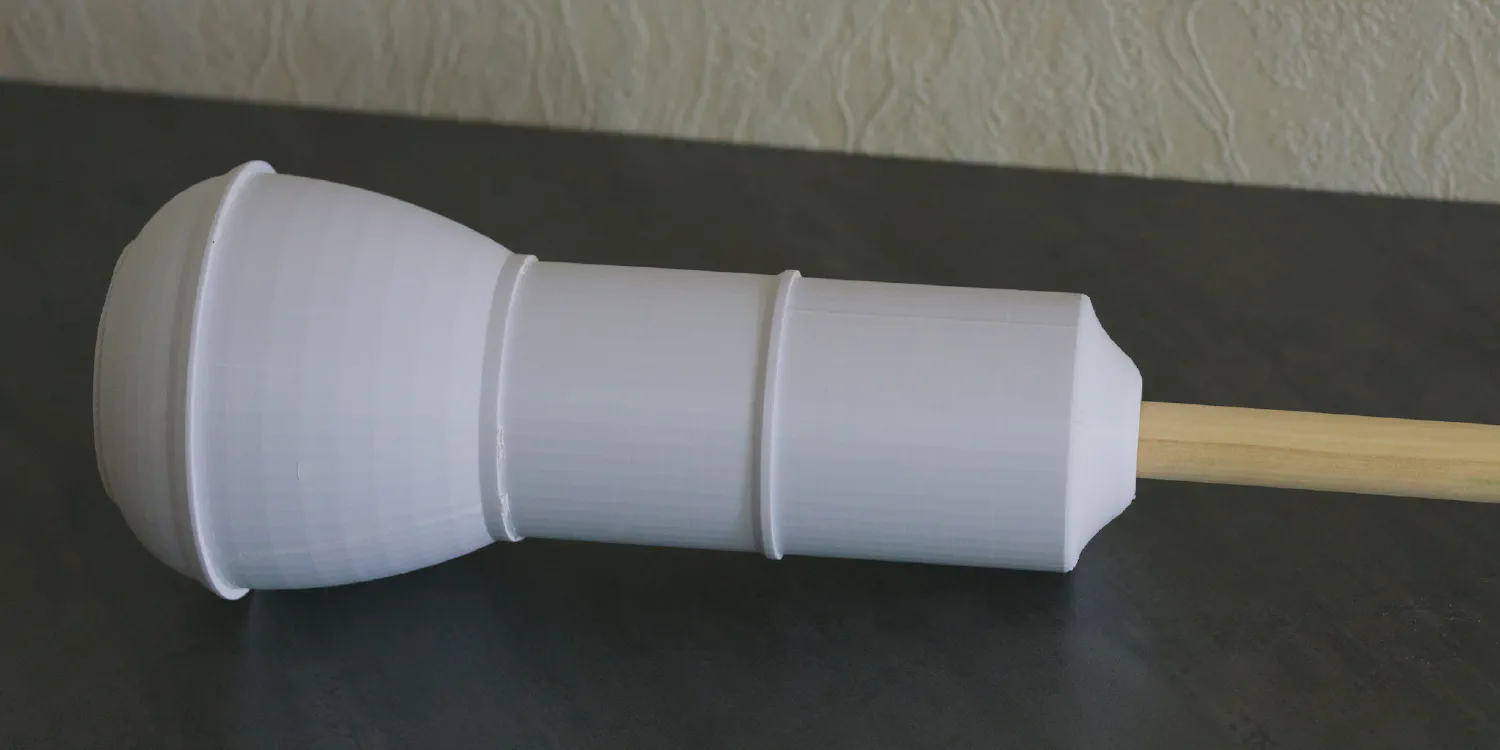
Table of Contents
Introduction
Nothing beats training with equipment that you made yourself, especially if it is something that you truly enjoy using year after year.
One such piece of equipment is this mace, which I designed and printed in 2023 (1.5 years ago at the time of writing). Having used and tested it for over a year, I can say that it is a great addition to my home gym, or yours if you decide to make one.
This is not the easiest make - you can find much simpler projects online that involve buying a bucket or a flower pot, filling it with concrete, and sticking a broomstick into it (example-1, example-2, example-3). However, this one can be more fun to make, and the end result is more aesthetically pleasing. Functionally, they will be very similar - with key differences being weight distribution and durability.
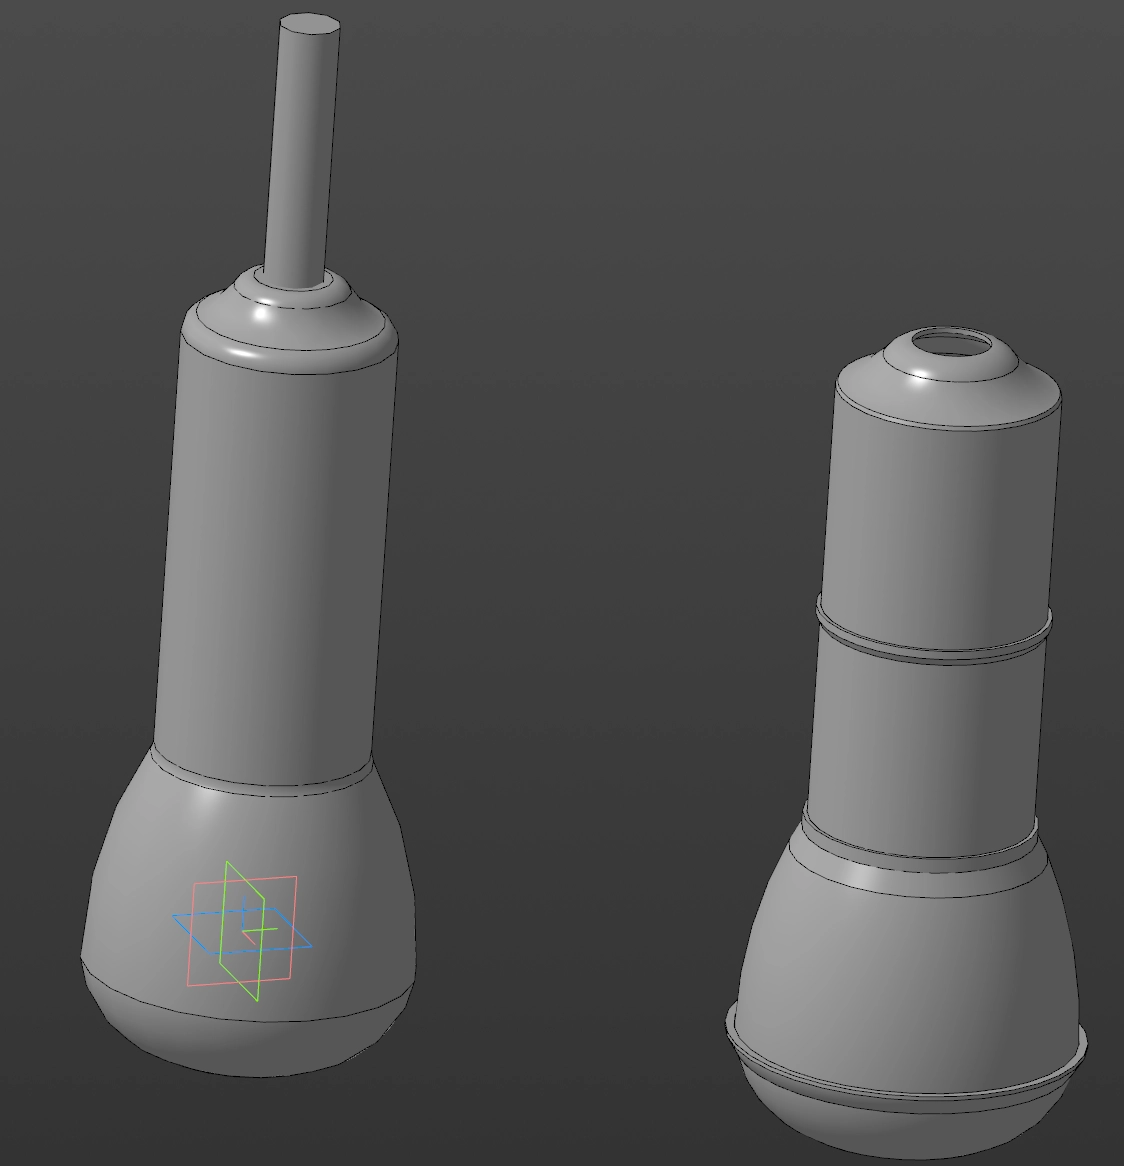
Assembly view of two variants of the mace
If you don’t have a 3D printer, don’t worry - you can find a local 3D printing service, which typically is much cheaper than you think - search local marketplaces like Facebook Marketplace, Craigslist, or do a Google search for “3D printing in [your city]”.
The design is published on Printables.
What is an Indian Club/Mace/Gada?
The Indian Club/Mace/Gada, is a traditional training tool used in various cultures for strength, mobility, and conditioning. It is typically made of wood or metal, and comes in various weights and sizes. For more information, you can refer to the Wikipedia article, or my other articles, like Training While On The Road, where I used a loadable Indian Club for training while traveling.
Parameters
These are the parameters of the final mace:
- Weight: 8kg (17.6 lbs)
- Full length: 142cm (55.9 inches)
- Handle length: 104cm (40.9 inches)
- Handle diameter: 30mm (1.18 inches)
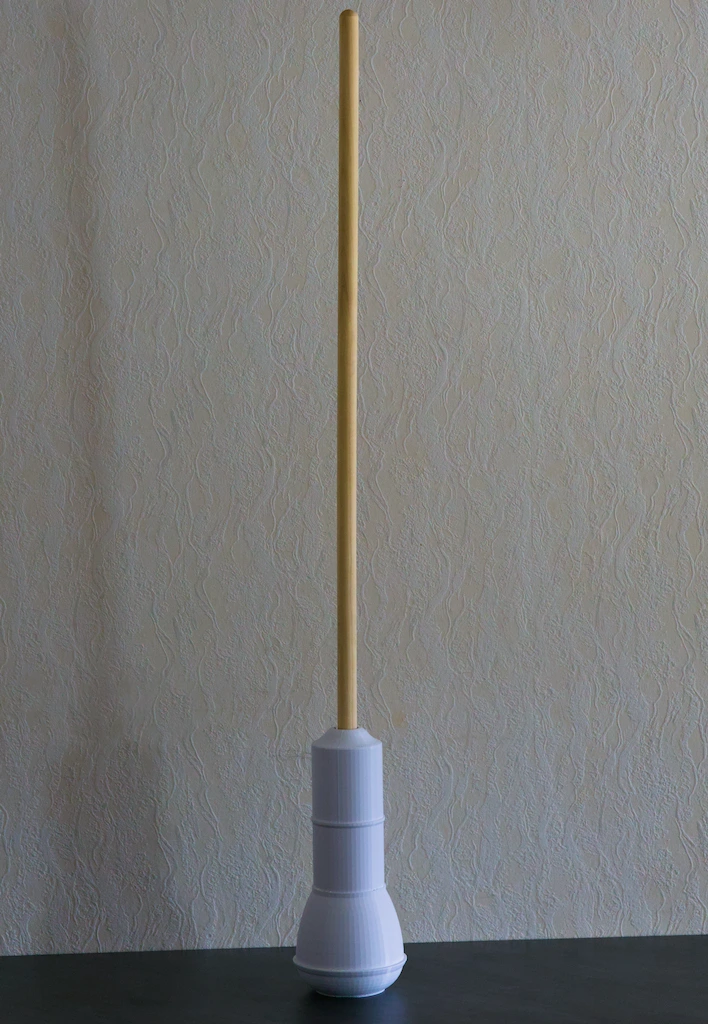
Full view
The weight may vary based on the concrete mixture and metal filler amount. The height is adjustable by changing the length of the broomstick handle, and the diameter of the handle can be adjusted by using a thicker or thinner broomstick.
You can also scale the model in the slicer to make it bigger or smaller, depending on your preferences.
3D printing
Get the model from Printables.
For the 3D print, I used the following parameters:
- Nozzle: 0.6mm
- Layer height: 0.3mm
- Supports: None
- Infill: 25-35% (or more, if you want it to be stronger)
- Material: PLA, PETG, or ABS (PLA is cheaper, but PETG is more durable. I used PLA)
- Infill pattern: Gyroid
There are 4 parts in total, and they are glued together during the assembly process. The parts are designed to be printed without supports.
As usual, these parameters are just an example - if you have a tested set of parameters optimized for high-strength prints, use them instead.
Materials
Here’s the list of materials you will need to make your own mace:
- 3D printed parts (4 parts, see above)
- Concrete - 5kg, and a bucket to mix it in
- Broomstick handle - try to find as thick as possible
- Nails or screws - to secure the handle in the mold
- Optional: Steel filler - to make the club heavier (nails, screws, metal scraps)
- A drill with wood bits and a mixing attachment - to make holes in the broomstick, mix the concrete, and vibrate the mold
- Super glue or 3D print glue - to secure the 3D printed parts together
- Funnel - to pour the concrete into the mold
- Newspapers or other material - to protect the surface you are working on
For the filler, I used halves of 200mm nails, which I have in large quantity because of my other hobby - breaking nails (this was a great way to utilize them). You can use any other metal junk you have at home, like old screws, nuts, or bolts. It is important to secure it to the structure to provide additional strength and not rattle around inside it.
Metal has about 3 times the density of concrete, so adding it will increase the weight without making the mace too bulky. I added around 2kg by putting the halves of nails. By placing them as close to the bottom as possible, the center of mass is shifted downwards.
The mold will stay on the mace after the concrete has cured. Initially I planned to remove it, but eventually decided to leave it on - reasons being that is will protect concrete from chipping, and it looks better than a bare concrete club.
Assembly
Here are the steps to assemble the mace:
- Drill holes near one end of the broomstick, and insert the nails or screws into the holes. Add the filler as well, securing it to the structure.
- Put the 3D printed parts together, except the top one (file name
club-mold-part-4.stl), securing them with a 3D print glue or super glue. - Insert the broomstick handle into the bottom part of the club
- Glue the top part of the club, thus making the mold complete
- Mix the concrete according to the package instructions, and pour it into the mold
- Use a drill or other tool to vibrate the mold, so that the concrete fills all the gaps and air bubbles are removed
- Let the concrete cure for 24-48 hours, depending on the type of concrete you used
See more in the pictures and instructions below.
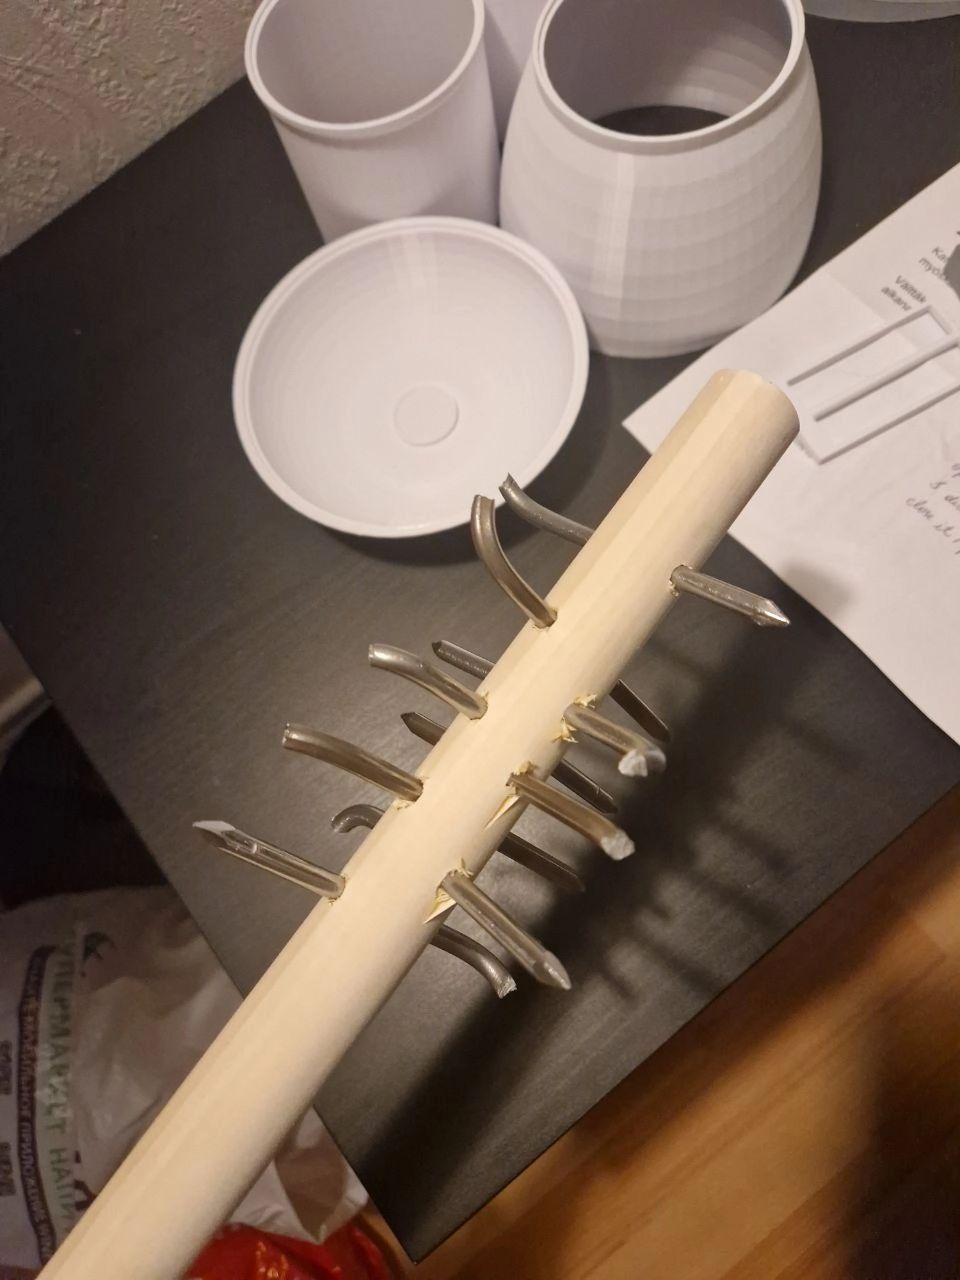
The aforementioned halves of 200mm nails, inserted into the broomstick
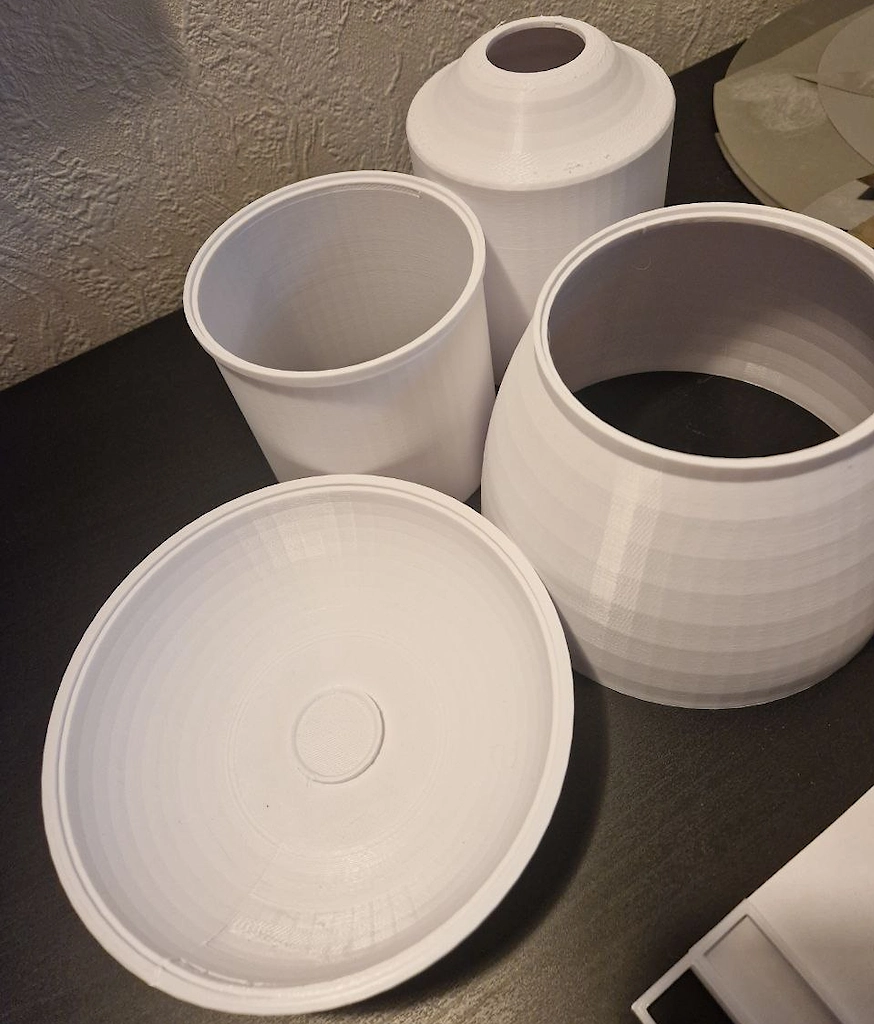
4 parts of the mold
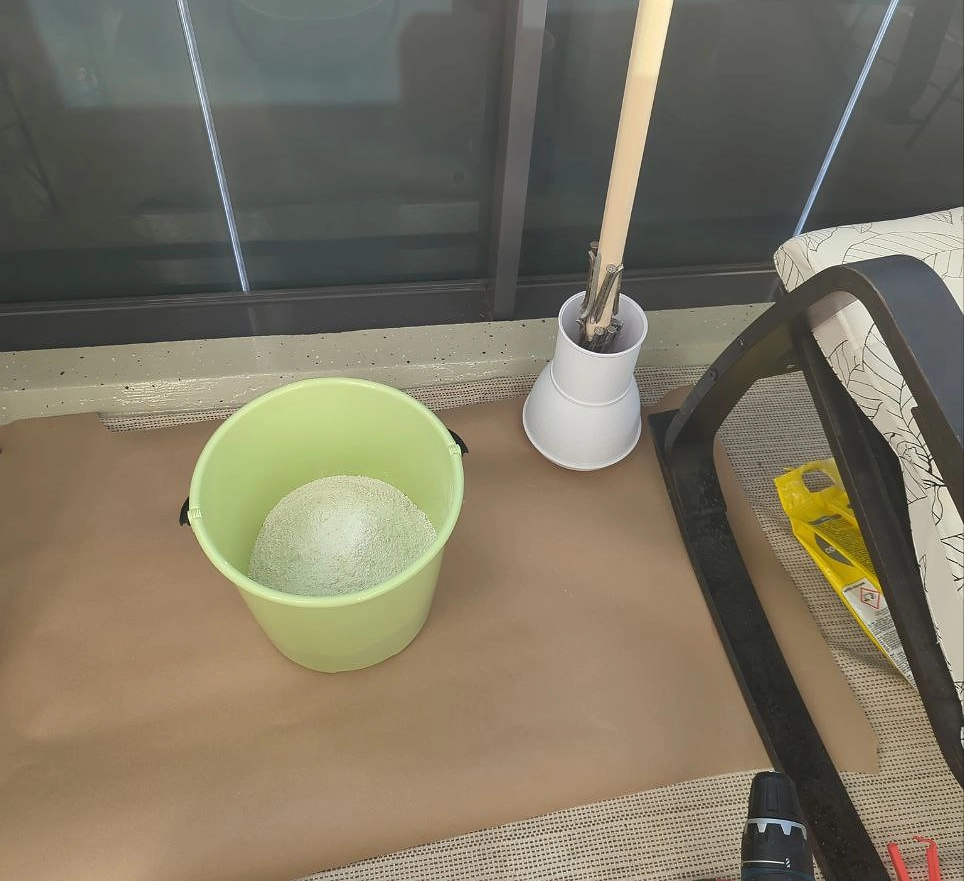
Ready to start mixing and filling
How to align the handle
In order to align the handle properly, you need to make sure the handle is centered at the bottom of the mold, as well as at the top. For the bottom, I made a small notch in the bottom part of the mold - see the picture below.
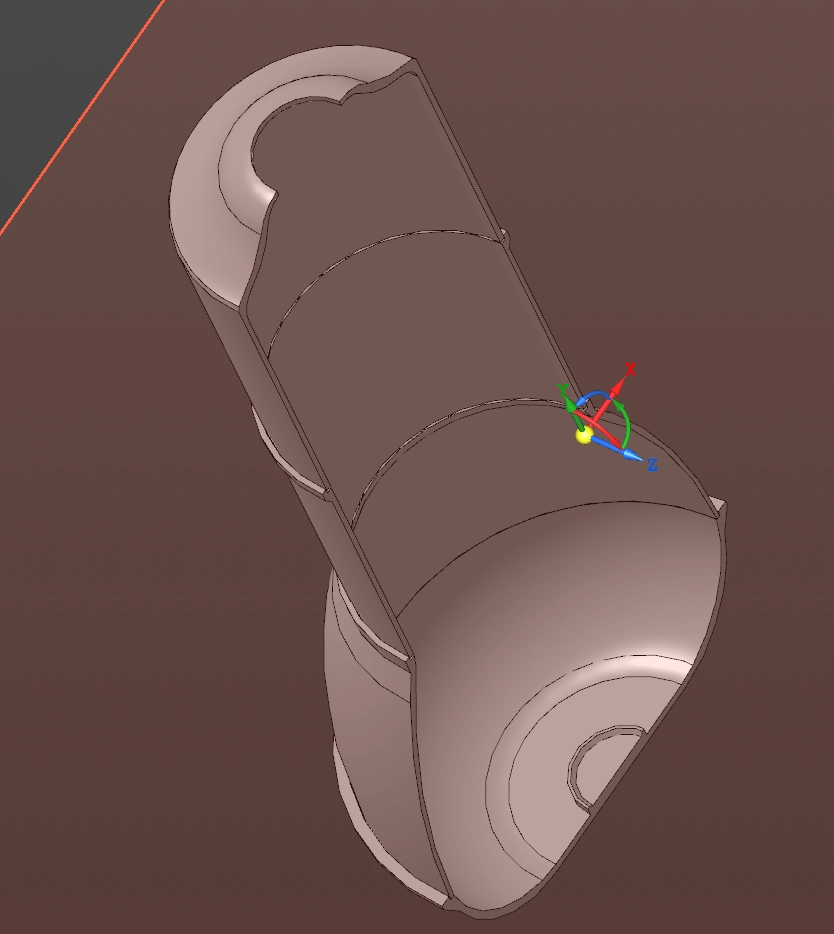
Sliced view of the mold: see the fitting for the handle at the bottom
For the top part, use a small piece of wood or any other spacing to center the handle in the top part of the mold. This will ensure the handle is aligned properly.
How to pour concrete
Depending on the type of concrete you use, and the width of the handle, you may need to cut an opening in the top part of the club to pour the concrete into it.
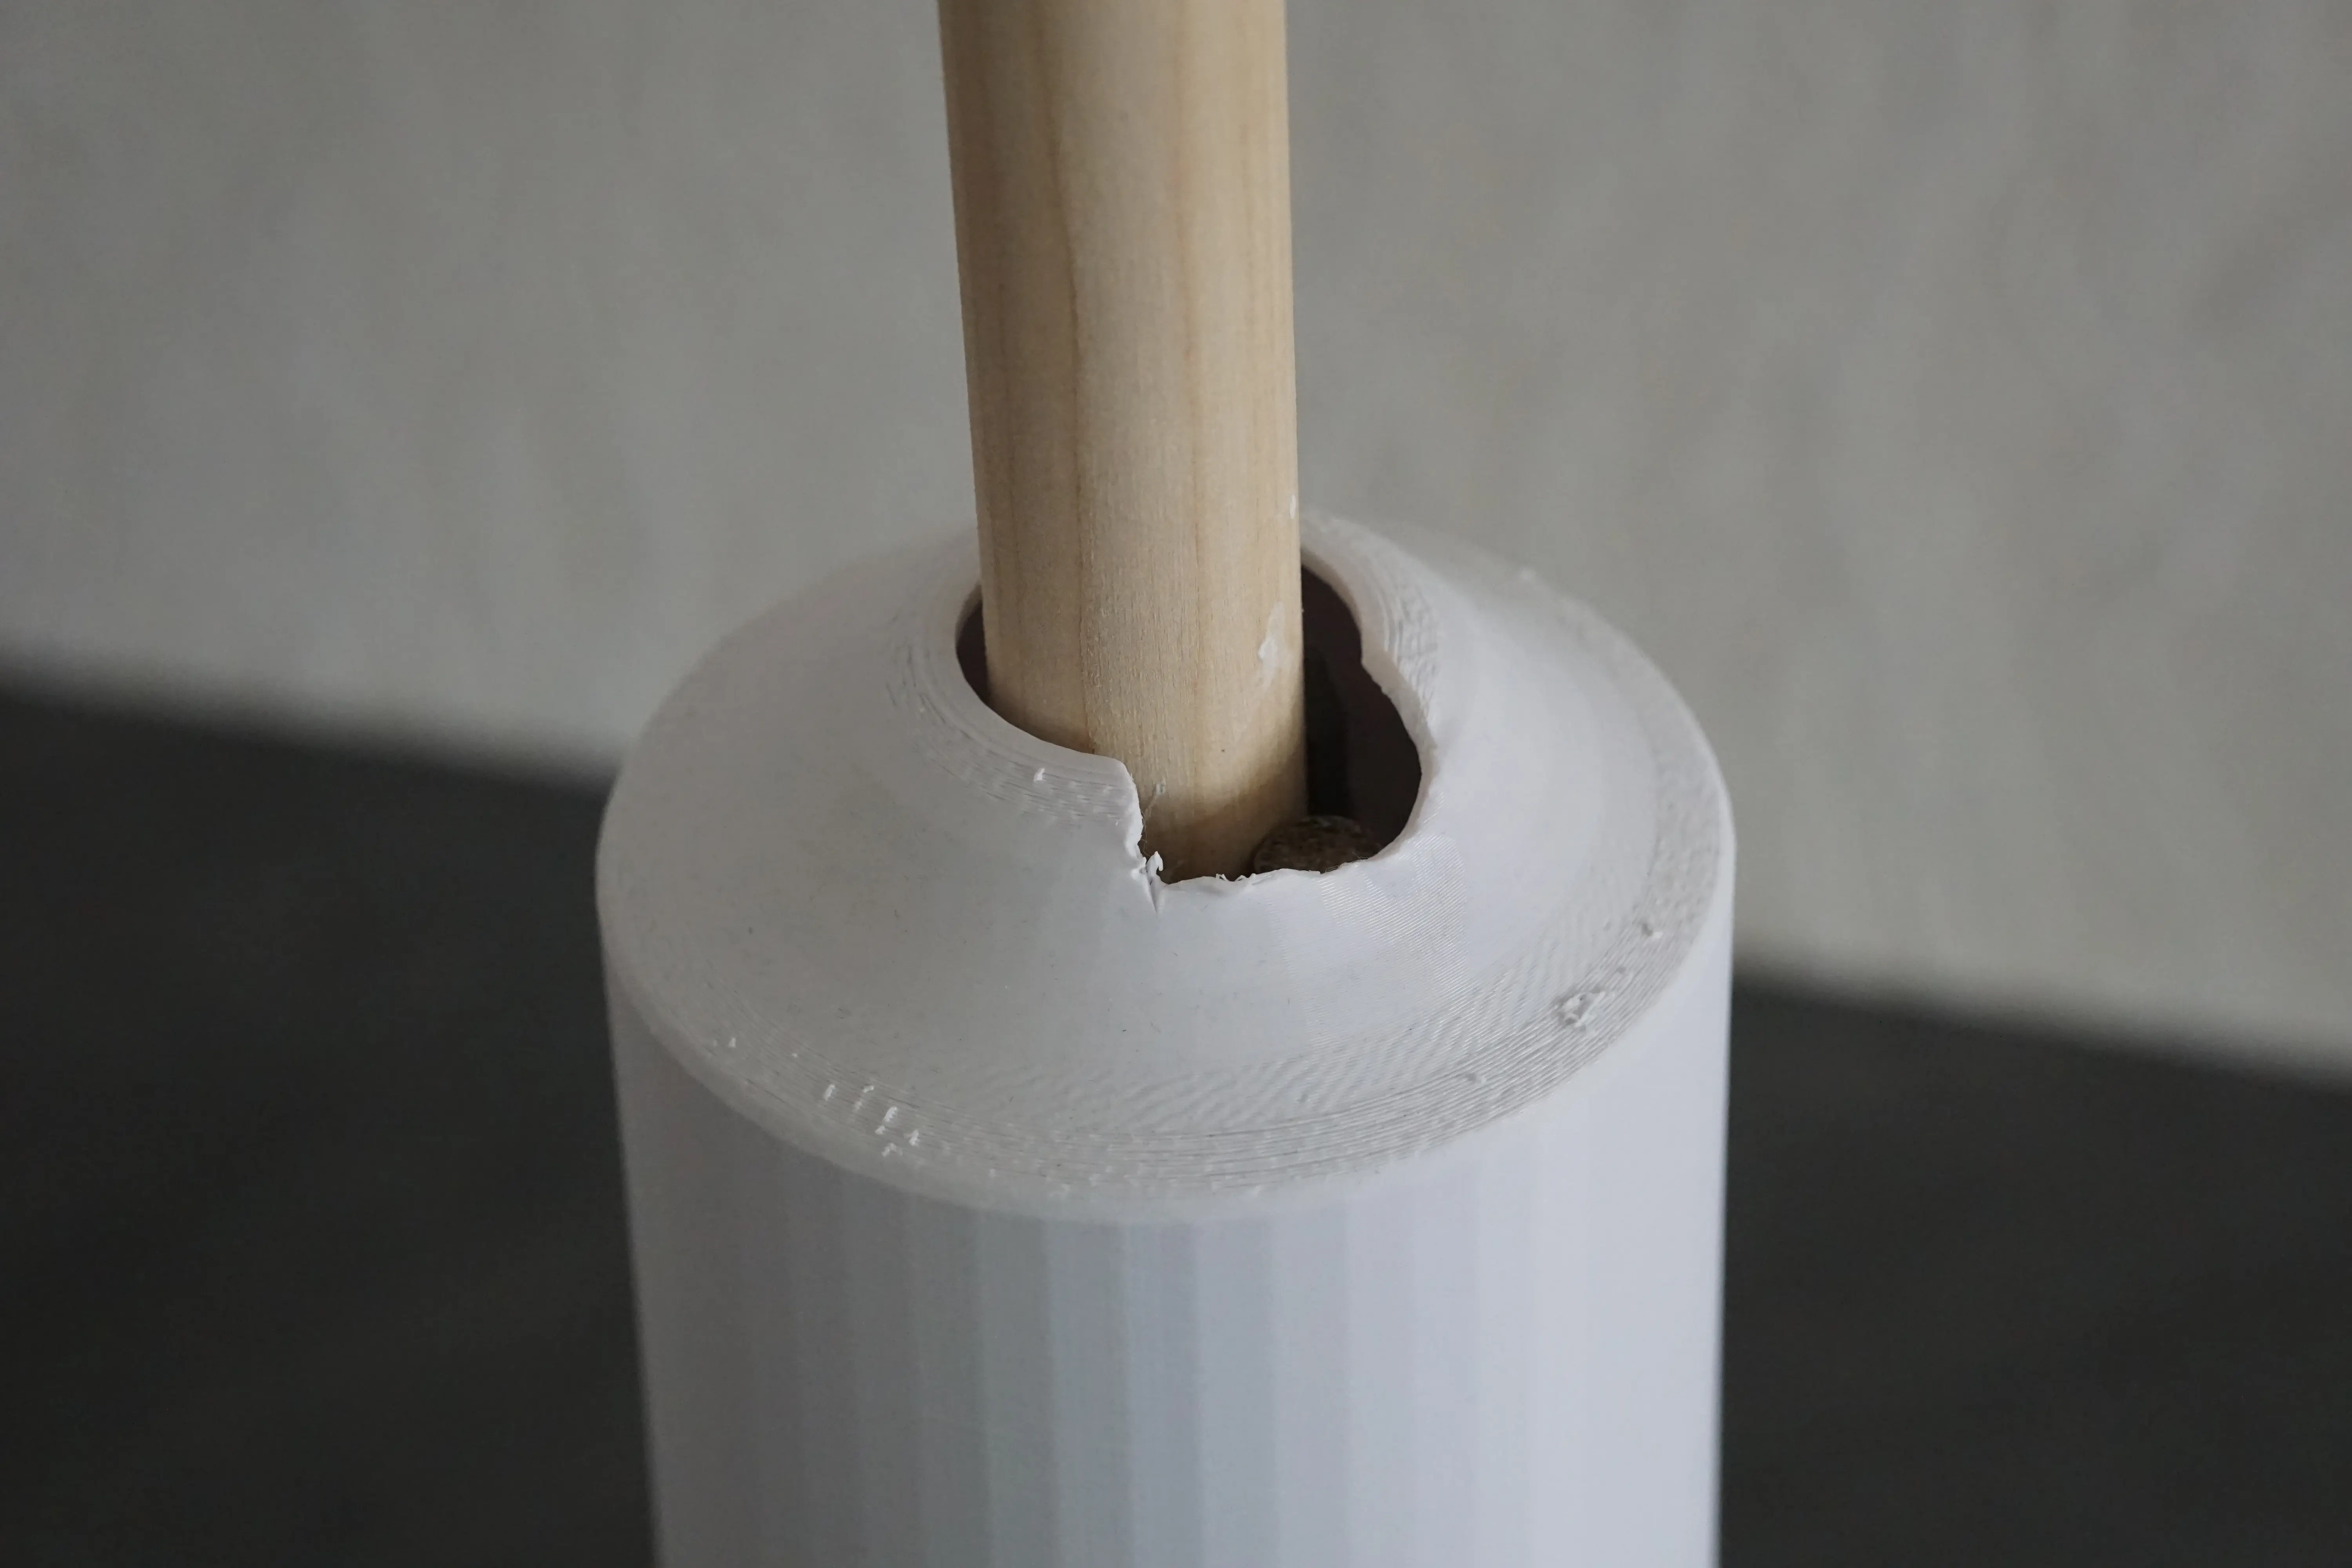
Opening to pour concrete
How to vibrate the mold
You can use the drill with a mixing attachment, or insert an object that has an offset center of mass into the drill such that it creates vibration. Afterwards, touch the drill to the mold to vibrate the concrete inside, helping it to fill all the gaps and remove air bubbles.
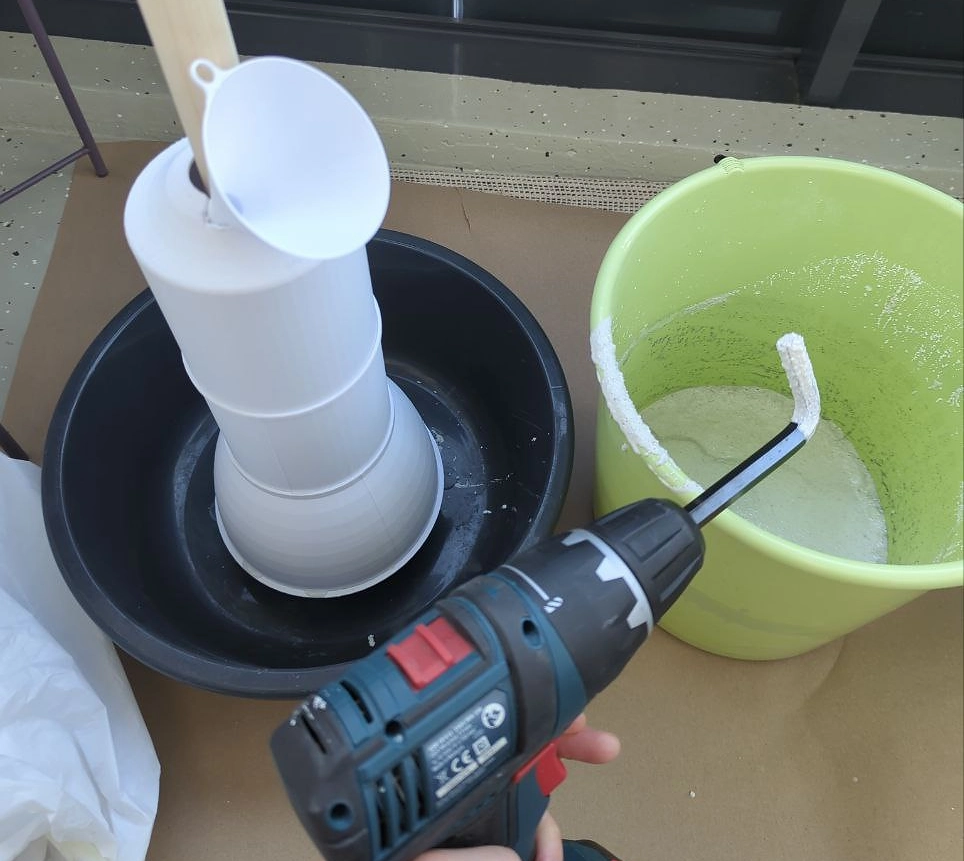
I used a hex key to mix the concrete and vibrate the mold
Testing
After the concrete has cured, you can test the mace by swinging it around and observing if there is any rattling or movement of the filler inside the club.
I recommend to do it outside, as the club is quite heavy and disintegrating it can cause damage to the surroundings.
If there is no rattling and it feels solid, you are good to go!
After 1.5 years of use
Overall the mace has held up pretty well - the handle is still solid, and nothing feels loose.
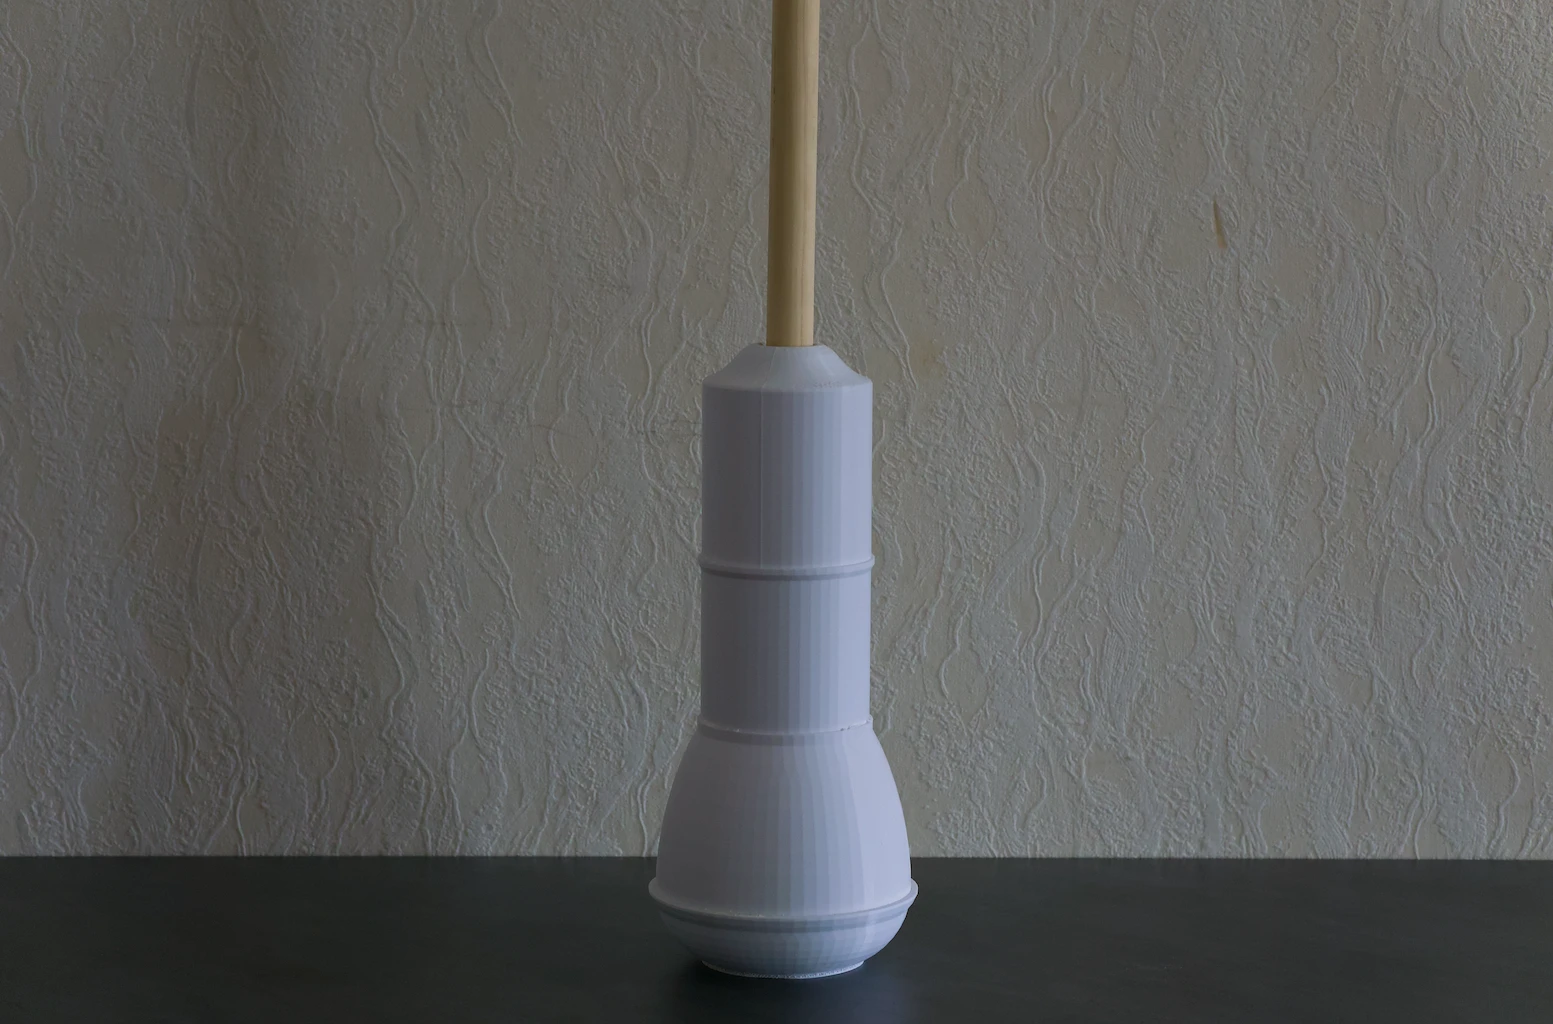
Side view
One minor issue is that the concrete has leaked during settling process and settled on the outside of the mold, and later on it crumbled off. This could have been avoided by more securely gluing the parts together.
Conclusion
I hope you found this step-by-step guide helpful in making your own mace, or learning something about the process. If you have any questions or suggestions for improvements, feel free to leave a comment below. If you have more suggestions for 3D-Printed training equipment, leave a comment as well - I am always looking for new ideas to try out.
Have fun with your mace, and happy training!
Andrew
Recent Posts

A plug-and-play checklist for an overnight or multi-day hike

Andrew O

A plug-and-play checklist for a day hike, tried and tested
Andrew O

A 3D-Printed tib raise bar for home use, loadable with Olympic plates
Andrew O
Leave a comment
Need help or want to collaborate?
Contact for any inquiries, I'll get back within 24 hours.